

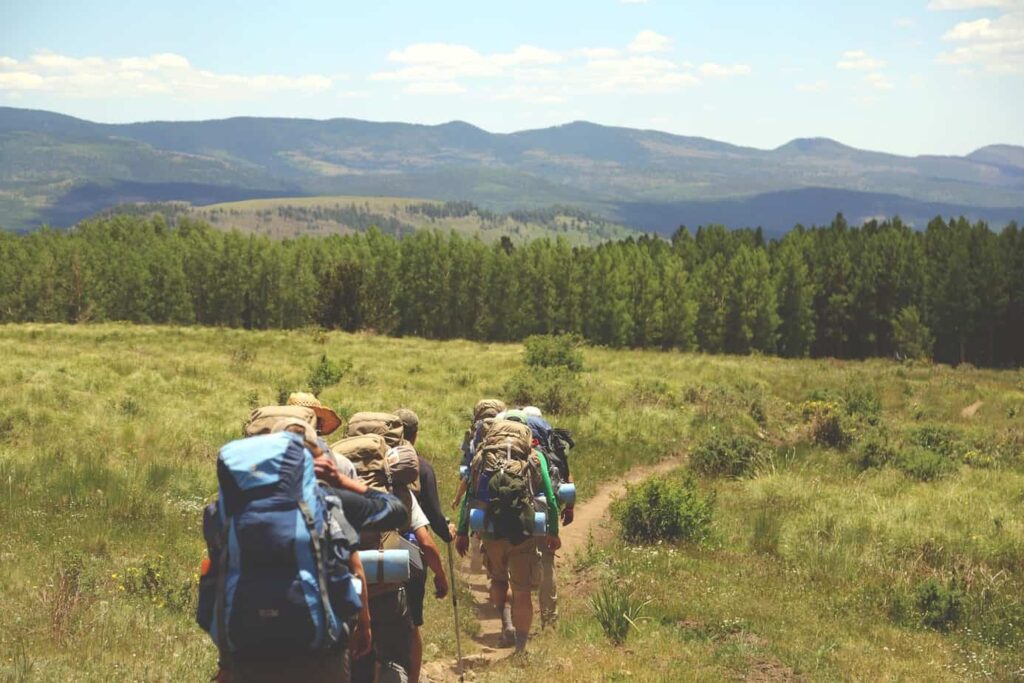
Backpacking
The Ultimate Guide to Backpacking Food covers how and what to pack for your backpacking trip meals.
Backpacking is an outdoor adventure involving loading all the gear you will need to survive one or more nights outdoors, hiking along a trail carrying this pack, and then sleeping outdoors.
Backpacking food
Since backpacking involves carrying everything you will need, this includes water and food.
When planning a backpacking trip and the meals you will be eating, consider how much food you think you will need and how much weight you can carry in your pack.
Amount of food
Backpacking is hungry work.
Pack the amount of food you would typically eat in a day with a few added items for snacks. Knowing how much food to bring per person will come with experience. If you are packing pre-packaged meals, then you can base your plan off the serving sizes on the package.
It may be a good idea to supplement the packaged meal with a trail bar, meat stick, a handful of nuts or other snacks.
Pack weight
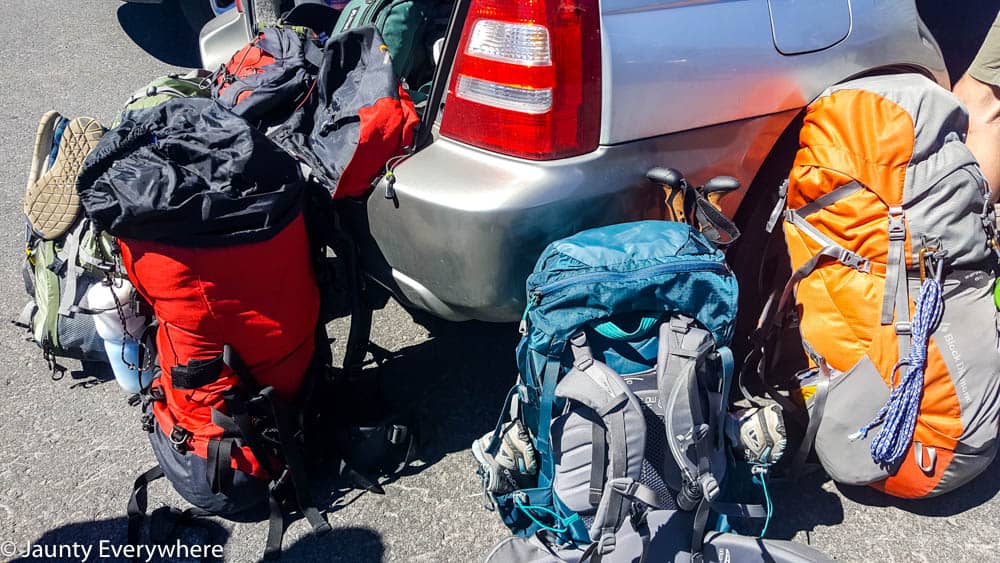
Rule of thumb: Your backpack should weigh in the range of 20% of your body weight.
Kids will typically carry less than 20% of their weight to enjoy the trip, while some adults will carry more than 20% of their body weight. We’ve found trying to stay in that range of pack weight makes for a more enjoyable trip.
Types of backpacking food
When planning a menu for a backpacking trip, there are several different routes you can take in food planning. You can purchase pre-packaged freeze-dried meals or create your meals by buying various items like salami, crackers, and so on.
Another option is to make your own packaged meals. This is more involved and takes more planning and preparation.
Each trip will probably look a little different and may involve a combo of all types of foods.
Packaged meals
Freeze-dried packaged meals like Mountain House, Backpacker Pantry, and other brands on the market are easy to pack, cook on the trail, and usually taste pretty good.
Pretty much anything tastes good after a long day of hiking.
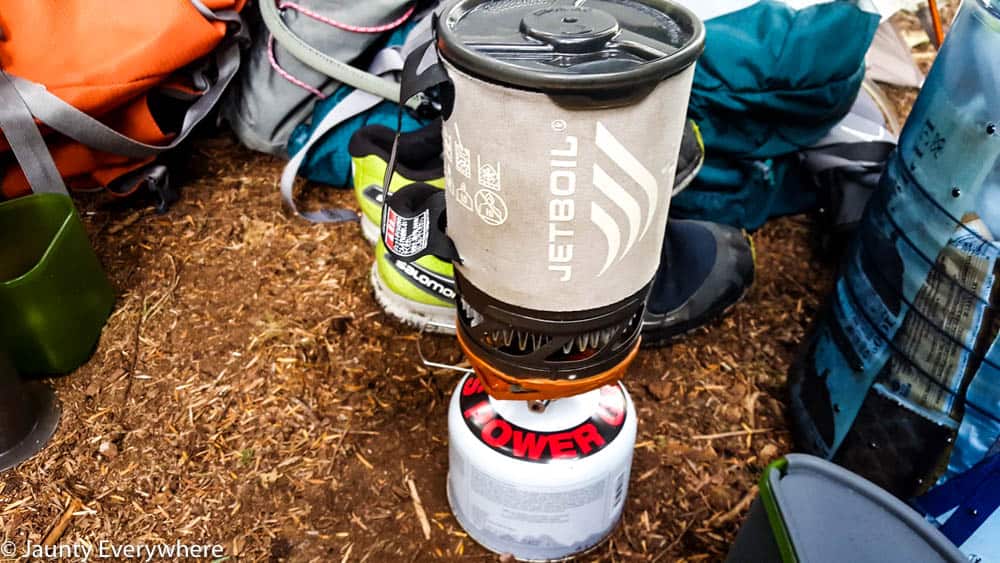
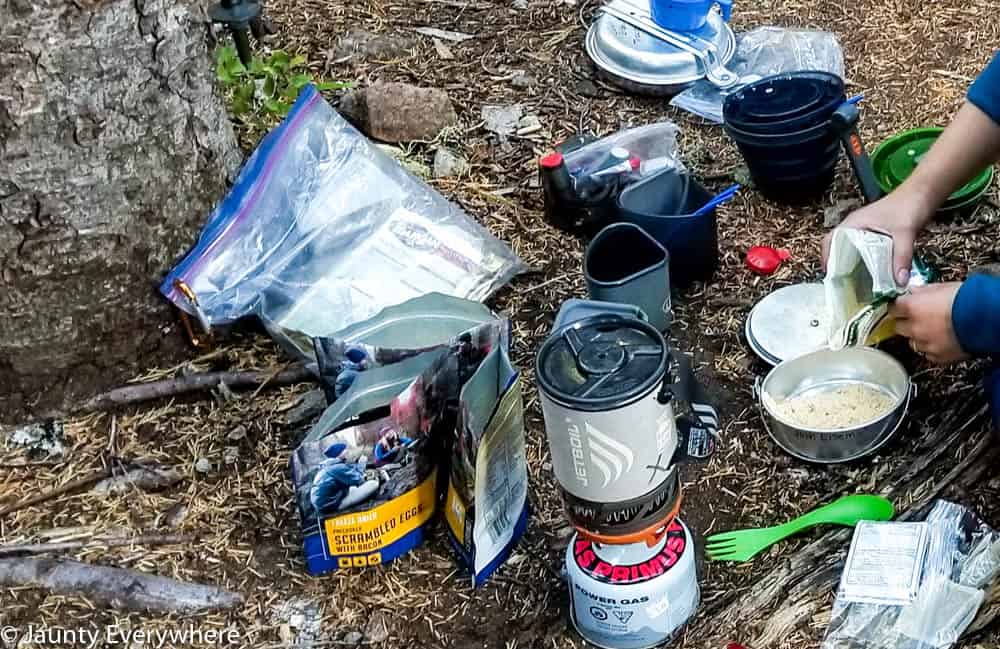
To use a freeze-dried meal, you will boil water, open the top of the pouch, pour the instructed amount of water into the pouch, stir the contents well with a spoon, and seal it closed. Typically these meals take between ten and fifteen minutes to “cook,” allowing the boiling water to absorb into the food and rehydrate it. After the specified time, you can open up the pouch and eat straight from it, saving on dishes.
There are many different types of meals to choose from – spaghetti and meatballs to beef stroganoff.
The benefits of using freeze-dried meals are that they are easy to purchase and pack; they are low mess because you can eat straight from the pouch.
Packaged meals do tend to be pricey. They range from $6 to $12 per meal. The cost rises when you figure in multiple people and multiple meals. It’s almost the cost of going out to dinner.
For convenience, it can be worth the price to avoid having to worry too much about meal planning, prepping, and cleaning up on the trail.
Freezer meals
Another way to get in a warm tasty meal without much preparation is to buy a freezer meal. This is best for short trips. Eat freezer meals on the first night in camp. Choose something that can be thrown into a pot and heated over a camp stove or a fire. A meal that only needs to be reheated, not cooked, is best because it takes less time and less stove fuel.
Store the meal in the freezer until leaving for your trip. Transfer to a cooler and pack with ice packs until you’ve reached the trailhead when you will transfer the meal to your backpack. The meal will stay cold until dinner and be ready for quick reheating.
Creating meals
Another option for planning a backpacking menu is to pull together ready-made foods to make up meals.
For example, a days menu might look like this:
Breakfast – oatmeal and instant coffee
Lunch – salami, cheese, trail mix, and an energy bar
Dinner – alfredo noodle packets with a chicken pouch added
These types of meals tend to be heavier and bulkier. For shorter backpacking trips, this isn’t much of an issue. The longer your trip, the less weight you want to be carrying.
Making your own packaged meals
Making your own packaged meals is probably one of my favorite backpacking meal planning options.
It’s a hobby.
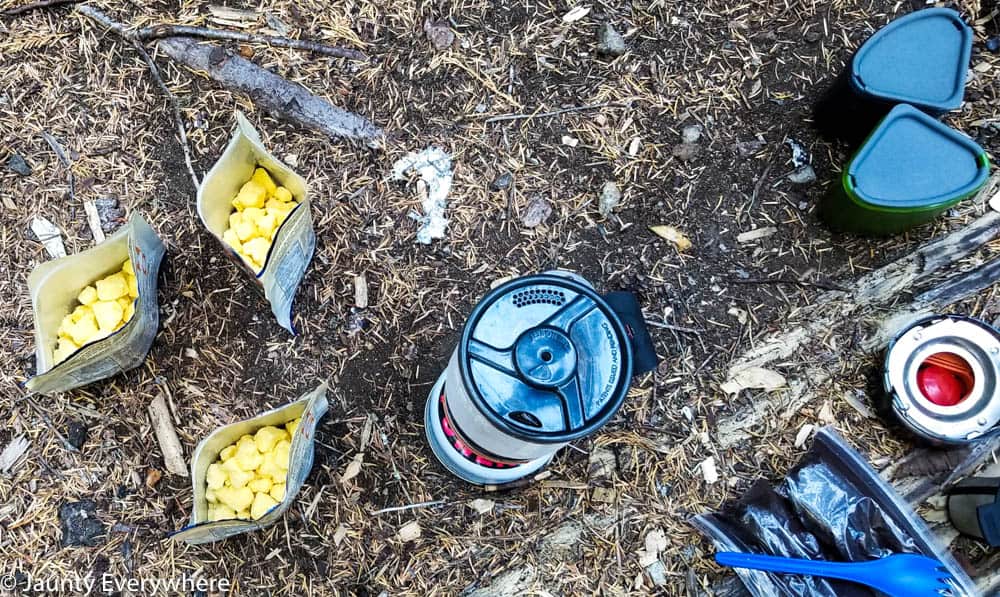
What this means is that you create quick-cooking meals, like the freeze-dried meals you can buy. Store meals in heavy-duty ziplock bags and boiling water added to cook the food. If you are concerned about the plastic, you can find foil pouches with seals to store the food and cook it in.
I’ve also saved the Mountain House meal pouches and reused them by adding in my food mixes and adding boiling water at mealtime.
Backpacking food for dietary restrictions
Ketogenic back packing
Just like eating Keto at home, eating Keto on the trail involves a lot of fat.
MCT oil powder
A great source of fat on the trail that can be added to any hot food, coffee, or tea is MCT oil powder. Use it like you would the oil, but its way more convenient for backpacking since it’s a powder.

Bulletproof coffee
My favorite backpacking breakfast for Keto is making a bulletproof coffee.
Make a cup of coffee using your preferred method.
We use an AeroPress, because why not take a whole coffee-making apparatus on the trail with you? We are from the Pacific Northwest; coffee is what we do.
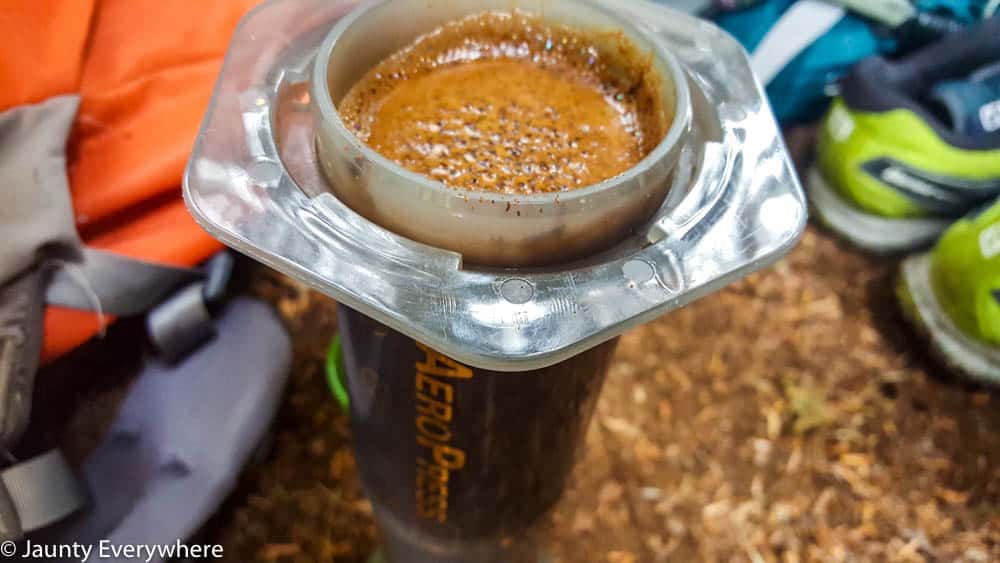
Once your coffee brews, add in a tablespoon or two of MCT oil powder, whole milk powder, and maybe a drop of stevia if you want a hint of sweetness. Stir it all up in your cup, and enjoy a bulletproof latte on the trail!


Keto backpacking snack/meal ideas
- Cheddar cheese, sugar-free dry salami
- Epic meat bars

- Trail mix: cashews, almonds, macadamia nuts
- Almond butter and coconut oil mix
- Beef jerky
- Pepperoni sticks
- Fat bombs
- Salmon pouch on cauliflower crackers


Keto packaged meals
Freeze-dried meals for those doing the Ketogenic protocol: Next Mile Meals
Resources
Camping and Hiking on Keto by Aussie Keto Queen.
Keto on the Trail: Hiking Through High Carb Territory by Gail Barrett on The Trek
Our post, Ketogenic Hiking Snacks: Fueled by Fat
Paleo backpacking
Paleo backpacking snack/meal ideas
- Baked veggie chips
- Nut, seed, dark chocolate, dried mango trail mix


- Date bars: Create. Nourish. Love.
- Epic meat bars
- Beef, salmon, or turkey jerky

- Oatmeal cups

- Stews: beef, chicken…
- Cheese sticks
Paleo packaged meals
Freeze-dried meals for those doing the Paleo protocol: Next Mile Meals
Resources
Must Hike Must Eat’s Paleo Backpacking Recipe Index
Gluten-free and dairy-free backpacking
Gluten and dairy-free backpacking snack/meal ideas
- Peanut butter and date granola bars: Minimalist Baker
- Fruit leather

- Trail mix
- Almond rice crackers and peanut butter

- Dried fruit
- Chicken and rice soup
- Mashed potatoes
Packaged meals
Fresh Off the Grid has a glossary of gluten-free packaged meals you can buy.
Resources
REI has a collection of gluten-free backpacking meals.
Vegetarian backpacking
Vegetarian backpacking meal ideas
- Hummus and veggies
- Trail mix- nuts, seeds, dried fruit, chocolate
- Seaweed snacks

- Date bars: Kirbie’s Cravings
Vegetarian packaged meals
Fresh Off the Grid: The Ultimate Guide to Vegan Backpacking Food- vegan packaged meals you can buy.
Resources
Vegetarian backpacking food from Trail Recipes.
Making your own packaged meals
Making your own packaged freeze-dried meals takes some preparation and creativity. You can use a food dryer to dry food that you can rehydrate in boiling water on the trail, or buy freeze-dried foods and combine them to create meals.
Drying your foods
Drying your backpacking food requires a food dehydrator. The food that you want to dehydrate will be laid out on trays and then placed in the dehydrator to dry; this takes from a few hours to a few days depending on the type of food and the strength of your dehydrator.
Trail Recipes is a website with lots of backpacking meal recipes and a food dehydrating class.
Must Hike Must Eat has a helpful post about how to dry your backpacking food.
What you will need
- Food dehydrator
- Recipes
- Ingredients for your recipes
- Foil pouches

- Measuring cups and spoons
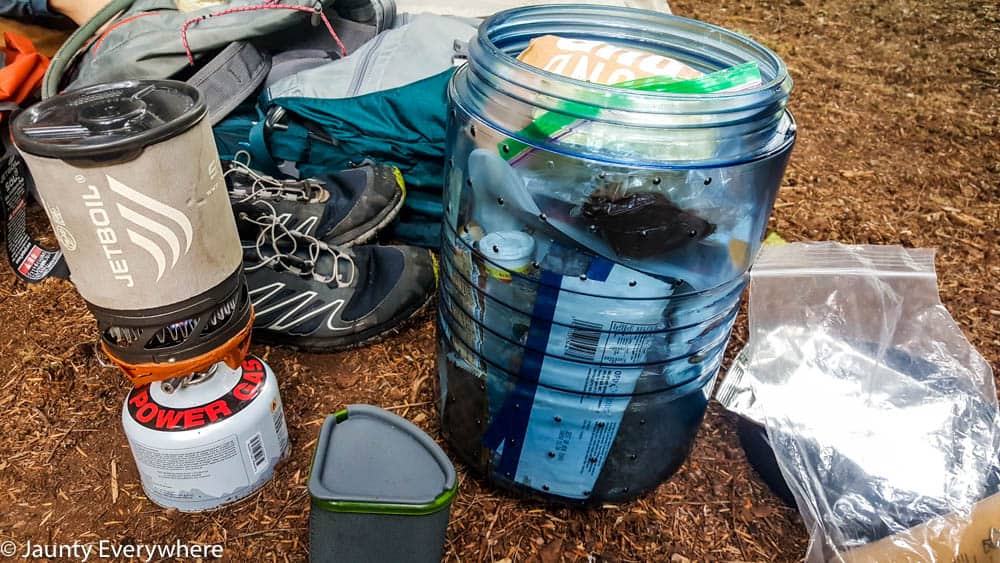
- Jetboil or another cooking stove – while on your trip

- Utensils- while on your trip: we use these

Making your own packaged meals
Prepping is different from dehydrating your meals because you can purchase elements of freeze-dried foods and mix recipes in foil pouches that later need boiling water added to them.
If you are interested in trying this process out, I suggest purchasing small packages of freeze-dried food that you can test to see if you like using it before buying larger quantities.
I continue to add to my ingredient collection by buying large cans of freeze-dried chicken, beef cubes, and mixed veggies.
Also, MCT oil powder, chicken broth powder, and powdered peanut butter cut down on weight, and I can create my meal recipes. This way, I know what is going into my meals, and I have more opportunity to make what we want to eat. Preparing your food works well for dietary restrictions.
How to do it
Start by finding a recipe, or coming up with your own.
Monica of The Yummy Life has a couple of great recipes that we have used in the past and enjoyed.
Once you have your recipes picked out, then you will source the ingredients.
Using a foil pouch, combine all the ingredients for one person’s meal into the foil pouch, measuring out the required amounts.
Seal up the foil pouch and store somewhere dry and cool until you pack for your trip.
What you will need
- Recipes
- Ingredients for your recipes
- Foil pouches

- Measuring cups and spoons
- Jetboil or another cooking stove – while on your trip
- Utensils – while on your trip: we use these
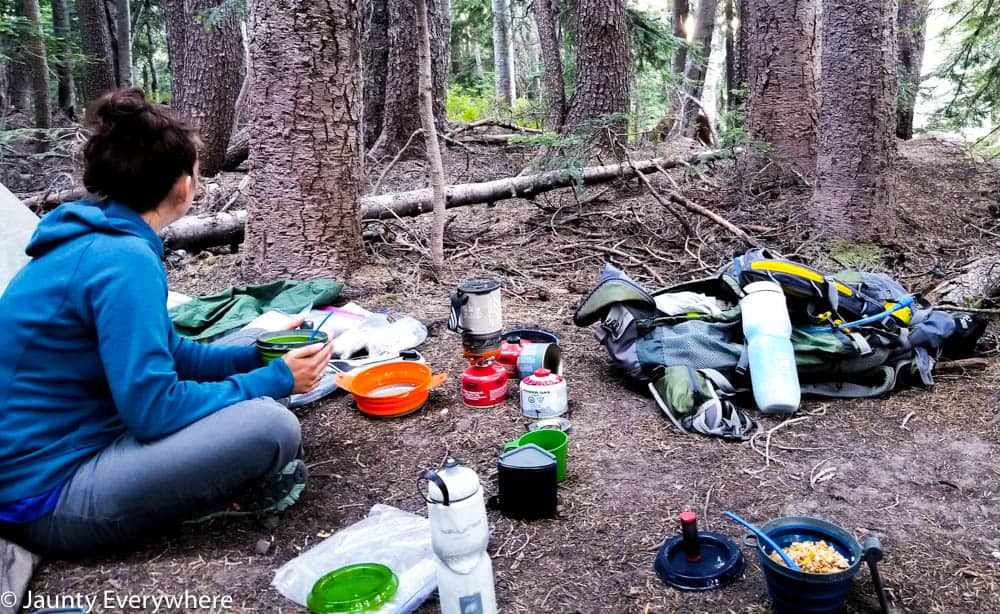
Making the meal on the trail
Some dry foods take longer than others to rehydrate.
I like to speed up the process by adding water to the pouches as soon as we get into camp. The water can come straight from your water bladder, or be freshly pumped. The point is to start allowing your food to soak. I pour water in, zip the food pouch closed, and let it sit while we set up our camp, make up our tent, and get our bedding situated.
Following this, we boil water for the meal. As the water is beginning to boil, I drain out the cold “soaking” water by unzipping the pouch slightly and then draining out the water so that the food doesn’t fall out. Then add the boiling water to the pouch and stir thoroughly, allow it to sit for fifteen to twenty minutes while you set up a fire, tell stories, or explore the area. Halfway through the soaking process, open up the food pouch, and give everything a good stir to make sure the water is getting to everything.
Once its done and all the food is chewable, enjoy your meal!
Clean up
One of the most significant benefits of using pouch meals, like prepackaged meals is that the clean up is very minimal. You’ve boiled water, used a food pouch, and a utensil, and that’s it. So all you have to wash is your utensil. The food pouch we store flat in a larger zippered plastic bag for the rest of the trip and keep adding our pouches as we eat the meals.
When we’ve returned from a trip, we scrub out the pouches, and if they are still durable and un-punctured, we save them for the meals of the next trip.
Recipe idea
Curry Beef Stew
Freeze-dried foods for making your meals
Here are a few items I keep handy for making my freeze-dried meals.
- Backpackers freeze-dried food sampler

- Chicken cubes

- Beef cubes

- Mixed veggies

- Powdered peanut butter


- Powdered MCT oil
- Powdered eggs

- Nutritional yeast (can be added to any soup, stew, or sprinkled on top of rice and pasta dishes)

- Chicken bone broth
How to plan food for a backpacking trip
Menu
Create a list of the days you will be on the trail, and what meals you will need to pack. With this information, you can begin to choose items for your breakfasts, lunches, and dinners. The meals don’t have to be served on the day specified, they’re place holders at this point, to make sure you’ve packed enough meals.
Create your menu by choosing items for each meal. Select from pre-packaged freeze-dried meals or your meal creations.
Shopping list
Once you’ve made your menu, pull together your recipes.
List all the ingredients you need to buy to prep your meals.
Go shopping for all your ingredients or meal elements.
Prep and pack meals
Preparing your meals will look different depending on what type of meals you will be taking.
If you are making your meals, then mix the ingredients and package them in the appropriate containers.
If you have purchased freeze-dried meals, then you can pretty much skip the prepping, because there is none to do.
Meals put together from items like salami, cheese, nuts, or other ingredients may need to be prepped ahead. Cut cheese into slices, mix nuts for trail mix, and add any other things you want.
Food safety
Follow general food safety guidelines when planning a menu and preparing food for a backpacking trip.
If you are going to be packing salamis or other cured meats, be sure to select meats that do not need refrigeration.
Storing food while on the trail
Once you’ve made or gathered all your backpacking meals, started your trip, and spent time hiking the trail, it would be a bummer to have an animal scurry off with your food bag when you weren’t looking.
It happens.
Once, we hiked up to a lake with a package of taquitos to heat over the fire. We got to camp and placed the ziplock bag of taquitos in a cold stream to keep them fresh until we ate. At dinner time, we went to get our bag of taquitos only to find that a couple of raccoons were chowing down on our dinner.
Rookie mistake!
Many hiking trails have precautions for storing food overnight. The precautions protect you from animals and vice versa.
Bear cans
A bear can is a heavy-duty plastic container with a lid that screws on and “locks.” Place all your food items and other items that have a scent – toothpaste, deodorant, chapstick, everything except hand sanitizer into the container. Screw the lid onto the container and tuck it beside a rock, tree, or bush about one hundred yards from any camp spot.
Bear wires
A bear wire is another food storage option in bear country.
A wire is draped between trees or poles.
Backpackers attach a bag of foodstuff to the wire and hoist it into the air above a bear’s reach. For this method of food storage, it is good to bring a cloth drawstring bag that will hold all of your food items. You can use a garbage or grocery bag, but they tear.
Hanging food
If you are on a trail that doesn’t require bear cans and doesn’t have a bear wire, it is still a good idea to hang your food. Other critters will be attracted to it. Again, it is a good idea to have a cloth drawstring bag to put your food in.
Find a tall tree with branches ten feet up or higher.
Use a piece of rope and toss one end over the highest branch you can reach. Catching a branch can take several tries. Adding something substantial, like a piece of wood or a rock tied to the end of the rope, will help. Get the rope over the branch so that you can reach the end. You will have ahold of both ends at this point. Tie your food bag to one end of the rope and then hoist it into the air. Lift it eight feet or more off the ground. Wrap the other end of the rope around the tree and tie it off to hold it in place – use a knot you can easily untie later.


Resources
Trail Recipes has lots of recipes and meal ideas for multiple dietary protocols.
The Yummy Life, A Week of Lightweight Nutritious Backpacking Food.
Traditional Cooking School: Enzyme Rich Homemade Larabars recipe.
Hiking Snacks From Thrive Market